A Hunter's Dream - How To Get The Most Out Of Bloodborne's Starting Weapons
When you awake bleary-eyed from dreams of fire, blood, and malformed faces only to find yourself in unfamiliar surroundings lying upon a sterile medical table, it’s only natural to feel out of your element. Once you’ve been savaged by werewolves, giants, and pitchfork-wielding maniacs after taking to the streets, you’ll feel out of your depth.
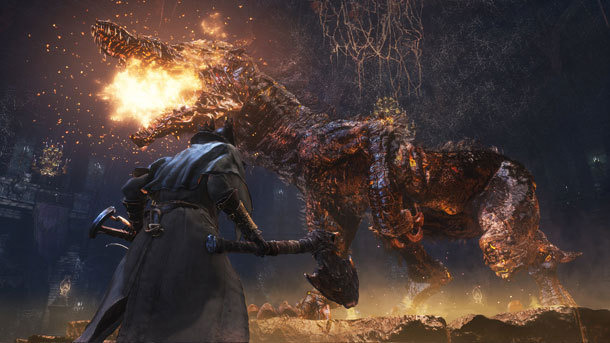
Bloodborne, the latest action game from Hidetaka Miyazaki and From Software for PlayStation 4, has Dark Souls in its DNA. Whether you are new to this style of game or are a hardened “Souls” veteran, there is one thing you should know: this game is hard. It will chew you up, spit you out, and trample over what’s left for good measure. All is not lost, however. With a lot of patience, a helping of grim determination, and no small amount of luck you can overcome any obstacle the game throws at you, no matter how impossible it might seem.
The first step on the road to success in Bloodborne is to understand the arsenal you have at your fingertips. As a hunter of beasts you have access to a wide variety of “Trick Weapons,” armaments that transform between two distinct modes, for you to employ in the art of hunting. Here is a detailed breakdown of the first three weapons you’ll be able to choose from:
SAW CLEAVER
The Saw Cleaver is the quintessential hunter’s weapon: it hits hard and fast, allowing players to utilize their mobility to get in close and hack through the opposition. It is light on stamina use, meaning that players can chain together long combos while still being able to dodge out of harm’s way.
In its short-range form it cuts through enemies with wide, horizontal slashes, even able to hit enemies beside and behind you. Additionally, the short-range form deals serrated damage which is lethal against beast-type enemies. This is very important during the first several hours of the game, as many of Bloodborne’s earliest enemies and bosses are weak to this property. Its charge attack hits hard and strikes fast, making it ideal for darting behind slower enemies and staggering them, which sets them up for a devastating “visceral” attack. The short-range form’s primary weakness is its extremely close range, but its high mobility and wide sweeps make up for it.
In its long-range form, the Saw Cleaver loses its damage bonus against beasts but boasts a longer range and sharp vertical swings that can strike at the vulnerable heads of taller enemies. Its R2 strikes and charge attack are a fairly wide horizontal sweep, which allows the player to deal heavy damage to multiple enemies at once. Although this form is better for keeping adversaries at a distance, the short-range form is much better for general combat.
THREADED CANE
The Threaded Cane is an incredibly versatile weapon, allowing players to keep the pressure on enemies up-close or conduct crowd control from a safe distance. Its moveset takes a bit longer to master than the more direct Saw Cleaver, but with a little practice and some upgrades the Threaded Cane’s flexibility can safely see you through the entire game.
In its short-form, the cane can be used to swiftly bludgeon single targets to death. It hits insanely fast and uses very little stamina, allowing players to stunlock weaker foes to death before they have a chance to even think of retaliation. Its R2 attack and charge attack do thrust damage which many stronger enemies in the game are weak against, in particular the otherworldly “kin” that appear in the later stages. In addition, it has one of the fastest charge attacks in the game, allowing players to hit enemies in the back and set them up for devastating “visceral” attacks with more regularity than nearly any other weapon. The cane’s one weakness is the direct nature of its strikes: comprised of pokes, jabs, and thrusts, the cane is nearly useless when surrounded.
In long-form, the cane separates into a long whip made of dozens of blades. This is one of the finest crowd control weapons in Bloodborne, allowing players to keep a safe distance while dealing decent damage to multiple enemies with its wide horizontal sweeps. Its sharp edges also have the benefit of dealing serrated damage, just like the Saw Cleaver’s short form. The whip sports one of the game’s best jump attacks: by flicking the left analog stick forward and pressing R2 the avatar leaps ahead and lashes the whip out in front of them, hitting multiple enemies at once from a ridiculous range. By using this move in conjunction with the evasive back step, players can attack enemies from a distance with little fear of reprisal. The whip’s primary weakness is its relatively low damage compared to other weapons, particularly armored foes, and its lack of a powerful charge attack.
HUNTER AXE
The Hunter Axe’s repertoire is filled with slow, weighty strikes that can knock enemies off their feet and keep them at a comfortable distance. Its stamina use is exceedingly high, which can make the early portions of the game more difficult. However, leveling up stamina a few times will unlock the weapon’s true potential.
In its short-range form, the one-handed axe deals heavy damage to enemies and can cancel them out of attack animations. Its charge attack rips through enemies with thick armor and doesn’t take too long to prepare for a weapon of this size. The short-range form’s primary weakness is its lack of truly standout moves to make up for its expensive stamina cost: when the player is hanging by a thread in the thick of battle it is hard to escape the feeling that the one-handed axe is a poor man’s Saw Cleaver.
This all changes in the Hunter Axe’s long-range form, where the weapon stretches out into a halberd. The halberd barely uses any more stamina than the axe and is a far more versatile weapon. Its standard R1 attack is a wide horizontal sweep that can hit multiple enemies from an incredible distance. Its jumping attack, performed by flipping the left analog stick forward and pressing R2, covers a lot of ground and smashes enemies from above and often hits their vulnerable heads. By far the halberd’s best move is its charge attack: once fully charged, the player's character spins the halberd around them in a circle, striking at anything within a 360-degree radius. The character then takes a step forward after the first spin and spins a second time, all but assuring that this assault connects with something. If the player can land both hits, most enemies (even tougher foes with thick armor) will be knocked several yards away from the player. This breathing room generally gives the player enough time to recover stamina and use this move again.
The halberd’s primary weakness is that it is heavy enough to require the use of two hands, meaning that players cannot use firearms or secondary weapons to hit enemies at a distance and counter their attacks. That said, the ridiculous range and utility of the halberd’s spinning attack allows players to engage in a mean game of “keep away,” which more than makes up for the limited options.
A HUNTER MUST HUNT
Much like the way that Nintendo’s legendary Pokémon franchise forces players to choose between three distinct starter Pokémon, the trick weapon you select to cleanse the streets of Yharnam with will define your style of play for the game’s first several hours. By using this handy guide to make an informed decision hopefully you will choose a weapon that matches your own sensibilities and will not simply survive your first night in the cursed city of Yharnam, but thrive.
